
Essential Motorcycle Maintenance Tips to Keep Your Bike Running Smoothly 2023


Motorcycle Maintenance Tips to Keep Your Bicycle Running Easily
Whether you are a prepared rider or a fledgling, keeping your bike in best condition is fundamental for your security and the life span of your bicycle. Legitimate cruiser support not as it were keeps your cruiser running easily but can also spare you cash within the long run. In this article, we’ll talk about a few basic bike upkeep tips that each rider ought to know.
Contents
- 1 Standard Oil Changes one of the ways Motorcycle Maintenance Tips
- 2 If you want to Motorcycle Maintenance, you must Check the Tires Routinely
- 3 Keep the Chain Greased up
- 4 Check the Brakes
- 5 Keep the Battery Charged
- 6 Replace the Discuss Channel
- 7
- 8 1. Walkaround
- 9 2. Battery
- 10 3. Tires and wheels
- 11 4. Final drive
- 12 5. Brakes
- 13 6. Fluids
- 14 7. Filters
- 15 8. Controls
- 16 9. Final check
- 17 Conclusion
Standard Oil Changes one of the ways Motorcycle Maintenance Tips
One of the foremost imperative angles of bike support is changing the oil frequently. Oil greases up the motor and makes a difference to decrease grinding, which can cause wear and tear on the motor. Over time, oil breaks down and gets to be less successful at greasing up the motor, which can lead to expanded motor wear and indeed motor disappointment. As a common run the show, you ought to alter your motorcycle’s oil each 3,000 miles or each six months, whichever comes to begin with.
If you want to Motorcycle Maintenance, you must Check the Tires Routinely
Checking your motorcycle’s tires frequently is another basic portion of bike upkeep. Appropriately swelled tires can make strides your bike’s dealing with and fuel economy, whereas disgracefully swelled tires can cause taking care of issues and decrease fuel productivity. In expansion to checking the tire weight, you ought to moreover check the tread profundity and look for any signs of harm or wear. On the off chance that your tires are worn or harmed, it’s imperative to supplant them as before long as conceivable.
Keep the Chain Greased up
The chain is an basic component of your motorcycle’s drivetrain and requires customary support to keep it running easily. Over time, the chain can ended up dry and grimy, which can cause it to wear and indeed break. To prevent this, you ought to grease up your chain frequently and keep it clean. Utilize a high-quality chain oil and apply it to the chain after each ride.
Check the Brakes
The brakes are ostensibly the foremost vital security highlight on your cruiser, and normal support is basic to keep them working appropriately. Check the brake cushions routinely for wear and supplant them in the event that fundamental. You ought to too check the brake liquid level and best it up in the event that fundamental. On the off chance that your brakes feel springy or lethargic, it’s critical to have them checked by a proficient.
Keep the Battery Charged

The battery is fundamental for beginning your bike and fueling the electrical components. To keep your battery in great condition, you ought to keep it charged and maintain it legitimately. In case you’re not attending to be riding your cruiser for an expanded period, you ought to disengage the battery and store it in a cool, dry put.
Replace the Discuss Channel
The discuss filter is an vital component of your motorcycle’s motor, because it avoids soil and flotsam and jetsam from entering the motor. Over time, the discuss channel can gotten to be clogged with earth and flotsam and jetsam, which can diminish your motorcycle’s execution and indeed cause motor harm. To anticipate this, you ought to supplant your motorcycle’s discuss channel frequently.
Motorcycle maintenance checklist
- Start with fresh fuel1 If you didn’t drive your motorcycle all winter, the first thing to do is change the fuel. …
- Change the oil. …
- Check the battery life. …
- Check your tires. …
- Inspect your chain. …
- Get plenty of fluids. …
- Don’t forget your cables. …
- Make your bike shine.
1. Walkaround
It sounds nearly doltish… but when is the final time you looked over each portion of your bicycle? Everything on a vehicle wears continuously, making indeed totally gacked components some of the time troublesome to take note in every day operation. Essentially clicking your attitude into “spot anything unusual” mode can uncover issues that require consideration — some time recently they turn into genuine, ride-halting problems.


Hunt for spills. Streaks of oil and earth down fork brings down propose fizzled fork seals. Dribbles beneath the bicycle must be explored. Is that coolant? Oil? Fuel? Provide it a sniff, at that point backtrack the source. If it’s been leaking for a whereas, you’ll got to de-gunk your bike’s under districts to zero in on the beginning.
Look at rotate focuses and moving parts for signs of wear or impedances (kickstand turns, swingarm and suspension linkages are nearly all around dismissed). Hit any zerk fittings together with your oil weapon until clean oil presses out the other conclusion of the depression, and note any bushings or heading due for encourage examination or substitution.
Turn the key. Test your lights and horn, and twofold check that your enrollment and protections are c
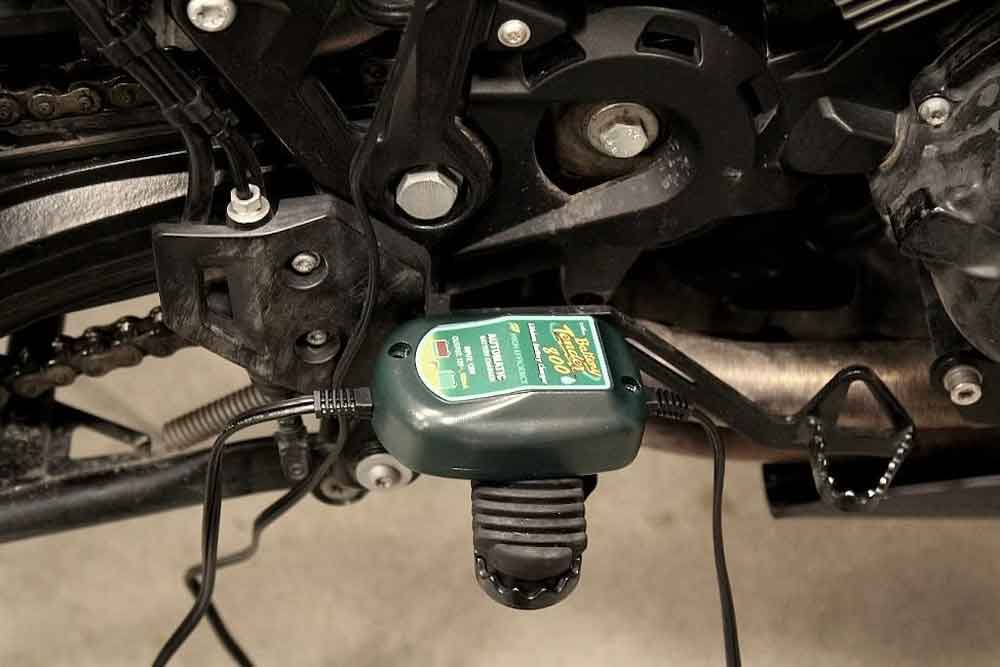
2. Battery
If your battery’s been on a maintenance charger, it should be fully charged. If not, plug one in now. If the battery takes a full charge, that’s a good sign — but doesn’t guarantee it won’t crap out on you halfway through your first big ride of the season.
Probing with a multimeter can give you a pretty good picture of your battery’s overall health (you want to see over 12.5 V DC at the terminals, key off), but the choice of champions is a battery tester that can test cranking amps against the number you punch in from the CCA rating stickered on the battery. If you only have a multimeter, you can perform a few other tests besides just checking standing voltage at the terminals.
Without any fancy meters at all, you should still be able to get a good gauge on whether or not your battery is beginning to bite the dust by how easily it cranks your engine over and its age. The manufacture date can also be found on the sticker, and if yours is pushing five years, you may want to start thinking about replacement. It’s better to replace a battery on your terms than to be at the mercy of a shop or dealership, and potentially adding the cost of a tow to the repair bill (ask me how I know).
Clean your terminals, then coat with dielectric grease to prevent corrosion. This is also a good time to open up your fuse box and inspect your fuses. Remember to check your spares, and tuck a few extra in there if there’s room. A blown fuse is just about the most facepalm-ingly frustrating reason to have to get a bike towed.

3. Tires and wheels
The importance of tire condition cannot be overstated. We motorcyclists only get two (maybe three if you’re trikey), and the amount of trust required to lean into that first corner is tremendous. While age should be considered, it is by no means the only — and certainly not the most important — factor in determining a tire’s roadworthiness.
Despite the prevailing paranoia of zealous date-code checkers, motorcycle tires have a longer life expectancy than you might think. Tire manufacturers consider five years to be the “sell by” date, anticipating years of service after that. So if you get a new tire and find it was made a year or two prior, remember it’s still got its whole life ahead of it. On a machine that is regularly ridden, you will probably never see a set die of old age. Still, you’ll want to take the manufacture date into account as you examine the rubber for dry rot, cracks, or excessive hardening from oxidation.
A motorcycle tire’s most honorable death is also its most common: wear. If your tire has wear indicators, it should be easy to spot if it’s time for replacement when the wear bar (set in a sipe or groove) becomes flush with the surface of the tire. If you’re not sure, check remaining tread depth at the area of the tire that has seen the most wear (almost always the center).
If you do need new tires, don’t forget fresh valve stems (or inner tubes) and balancing weights (if you plan to mount and balance yourself). Wheel weights can fall off — check that yours are in still in place. You’ll also want to check your wheel bearings, but first, you’ll need to get your wheels off the ground.
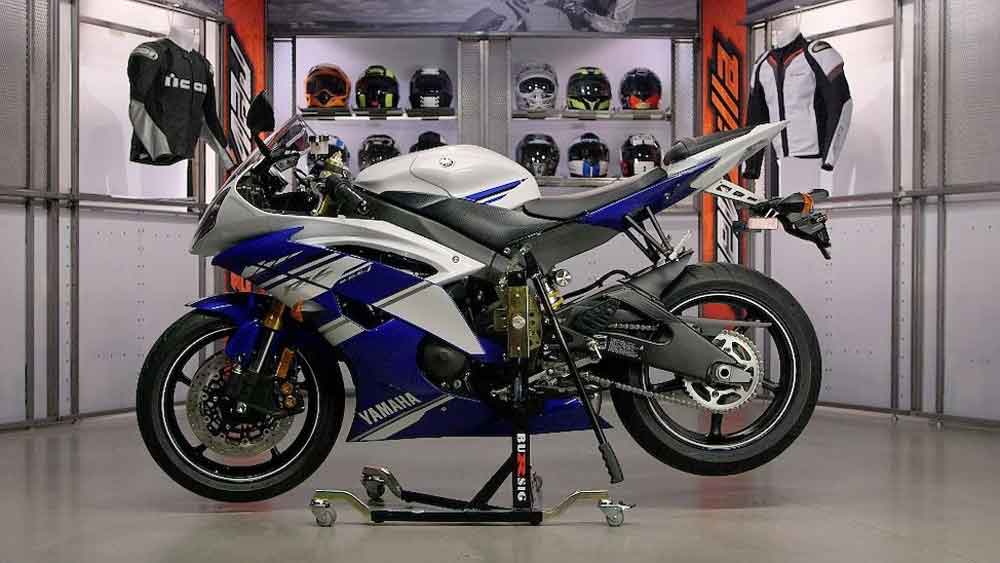
If you aren’t already invested in a lift, jack, or Pit Bull-style front and rear stand, you might consider a Bursig lift for the job. For about the same cost as front and rear stands or a hydraulic motorcycle jack, you can get an all-in-one, space-saving tool that can not only lift your whole motorcycle off the garage floor, but also dolly it around securely by yourself.
Once you’ve elevated at least the front end of your motorcycle, you’re ready to begin. It is possible to detect badly worn wheel bearings without disassembly. First, grab each wheel firmly on each side and shake to check for excessive play (a dead giveaway your bearings are toast).
If all feels tight, give each wheel a spin to check rolling resistance. Don’t expect the wheel to spin all day with the brake assembly still in place — pads drag lightly even when not engaged, and the chain, belt or shaft final drive produces additional drag at the rear wheel — but you should be able to tell by hand if the wheel rolls smoothly on its bearings or feels crunchy.
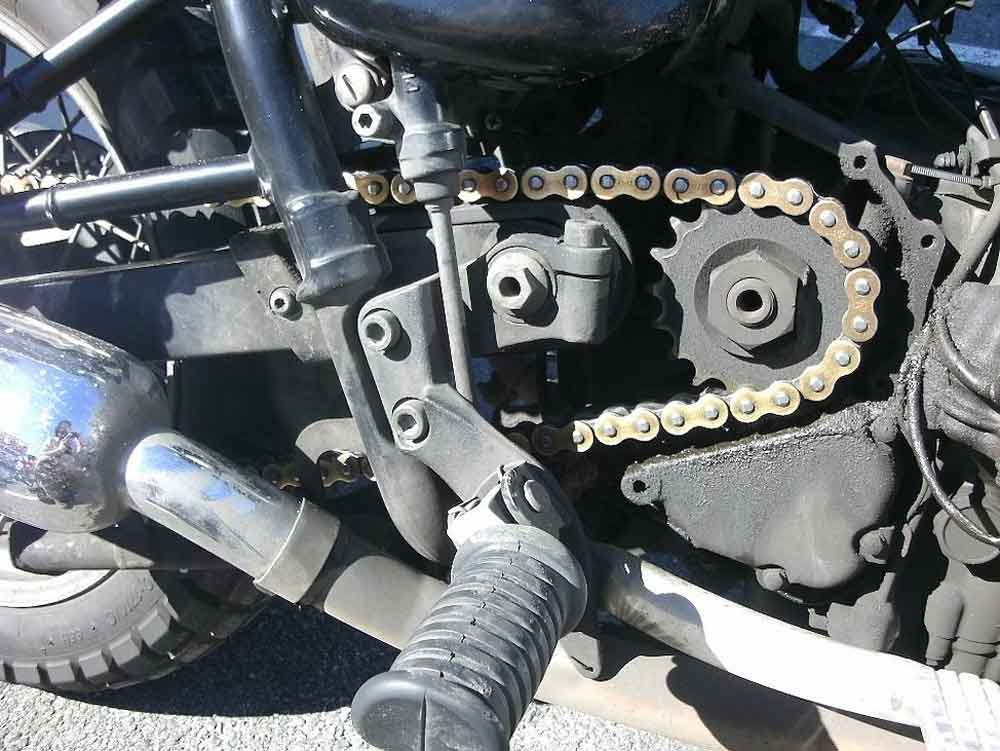
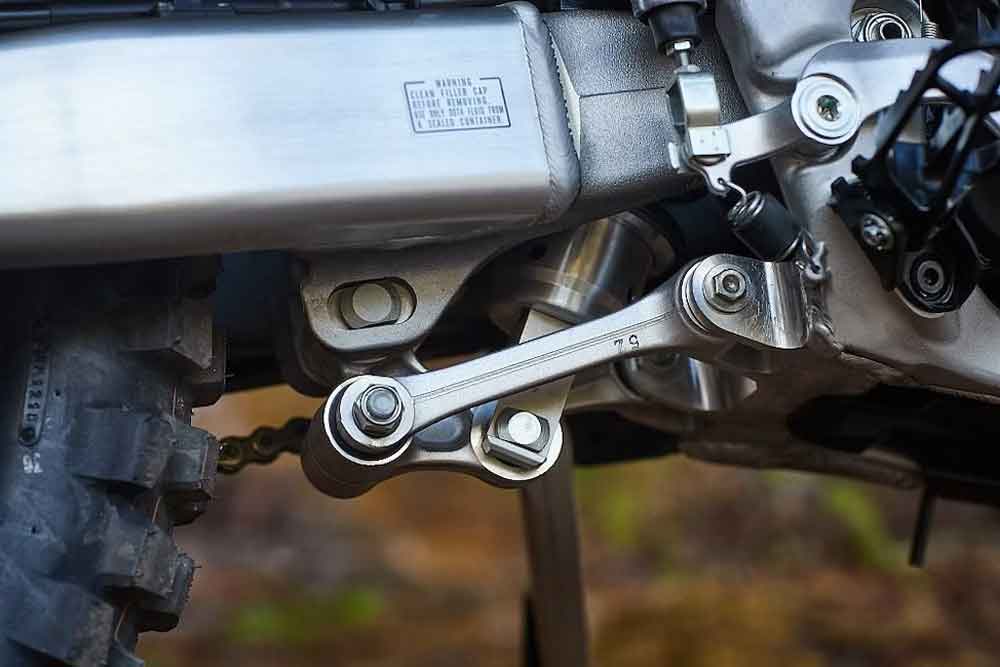
4. Final drive
As you rotate the rear wheel, pay attention to your drive chain or belt. (If you have a shafty and don’t know how old the gear oil is, now’s the time to change it!) First, look for any binding, seized links, or excessive chain and sprocket wear that would indicate it’s time for replacement. If all looks well, clean your chain with solvent and brush, then lubricate it.
Check chain alignment with an alignment tool (don’t just trust the hatch marks on your axle blocks or swingarm, if you have them) and measure tension with a gauge. Your manual will provide specs for tension and wear, so you can measure to see if the chain needs to be replaced.
If you have belt drive, look for cracking, wear, or stray cords. If the belt looks glazed, or any teeth are chunked out, replace it. Drive belts last a long time, but you want to replace one long before it’s hanging by a thread. Not only will a failed belt leave you stranded, but they have a habit of snapping under acceleration (think merging on to a highway in front of tractor-trailers).
If your belt passes visual inspection, refer to your service manual for the specs, and then check belt tension with a gauge. It is well worth the investment (and is much more civilized than hanging jogging weights off the belt with wire or zip ties and measuring deflection). After any necessary adjustment, spin the whole shooting match a few times and measure again.

5. Brakes
You can check your brake pads with the tires on the ground, but it’s a little easier while your bike is still up in the air. Plus, by rotating your wheels, you can check your rotors for warping. You’ll also want feel the surface of the rotor for any scoring, and visually inspect for glazing. Don’t panic if you see some light surface rust. If your bike’s been sitting, this is completely normal and will go away as soon as the brakes are used, but I like to hit them with some brake cleaner just to make myself feel better.
Next, note how much meat you have left on the pads and ensure that they are wearing evenly. Measure the remaining depth of the pad material against the spec in your service manual to be sure they’re still safe to run. Trying to use up every last bit of a brake pad is a short-sighted strategy because you risk trashing your rotors if you wear down to the backing plate, or worse, you’ll fail to stop.
Take a look at your brake lines, as well, for any signs of wear or age. Rubber brake lines don’t last that long, so even if your bike is only five or 10 years old, they might be ripe for retirement. New stainless steel lines will improve brake feel and control considerably.
Brake fluid is even more commonly neglected than lines. Check your manual for a replacement interval for the fluid, but those who ride hard (track days?) or choose to follow aggressive maintenance schedules replace it about every other season or any time the fluid is overheated.
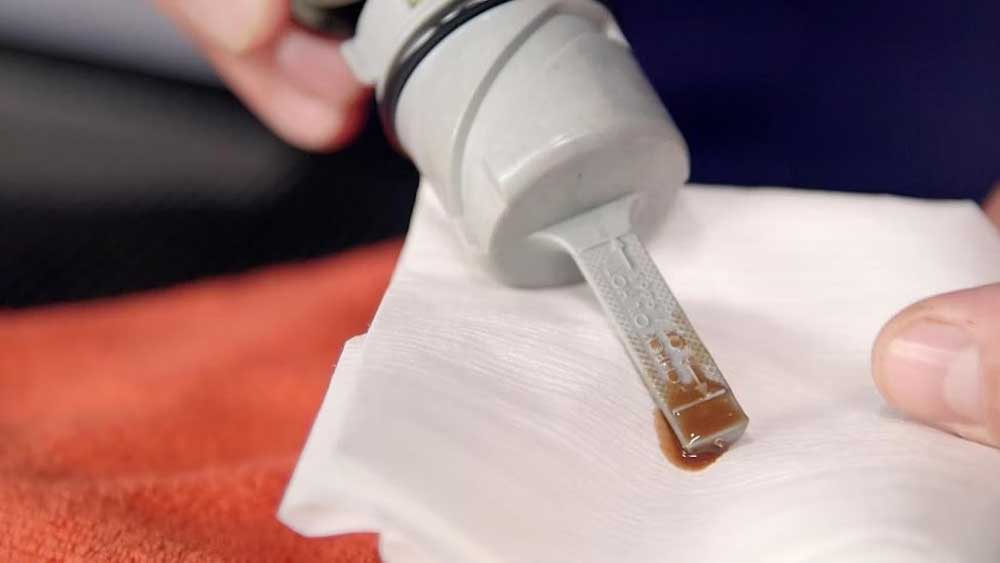
6. Fluids
Brake juice isn’t the only often overlooked fluid to refresh. How old is your coolant? Fresh coolant should also be an every-other-season affair, although your machine’s maintenance intervals may differ (check the manual). A good flush with water, or even just a simple drain and fill will go a long way to preventing corrosion inside your cooling system. (Installing a fresh radiator cap at the same time is cheap insurance.)

If you’re like me, you were due for an oil change at the end of last season, but the cold sapped your motivation and you traded your coveralls for pajamas.
My Dyna’s due for a change in all three cases, so I’m looking at fresh motor oil and filter, primary fluid, and trans fluid before my first trip of the season. Even if you’re not quite at your recommended mileage interval, it never hurts to do it a little early so you’re good to go for the season.
Speaking of time, you’ll want to take oil age into account as well as mileage. If you have multiple bikes, or just don’t rack up a lot of miles on your machine, it’s good to change the oil at least once a season so you know it’s been done and you don’t have old, contaminated oil in your cases.
It’s important to note that lower mileage often equates to a lot of short rides, which means a lot of heat cycling to invite moisture condensation, and that’s what really breaks down oil. So take type of riding into account, as well, when deciding when to change your oil.

7. Filters
Always use a new oil filter, and make sure you stay on top of fuel filter and air filter recharging or replacement. My bike calls for air filter service at every oil change (5,000 miles), and fuel filter every 25,000 miles. Check your manual or a parts diagram; you may have another fuel screen in the petcock or fuel pump pickup that needs attention, as well.
Also check if your exhaust uses fiberglass packing (cotton candy shooting out your exhaust tip is a dead giveaway your packing’s toast). This is not an off-road-only phenomenon, although intervals are typically much shorter for dirt bikes (a matter of hours, not miles, especially for two-strokes, where oil is a factor on top of heat). Repack the muffler whenever you recharge or replace the air filter. What goes in must come out, right?
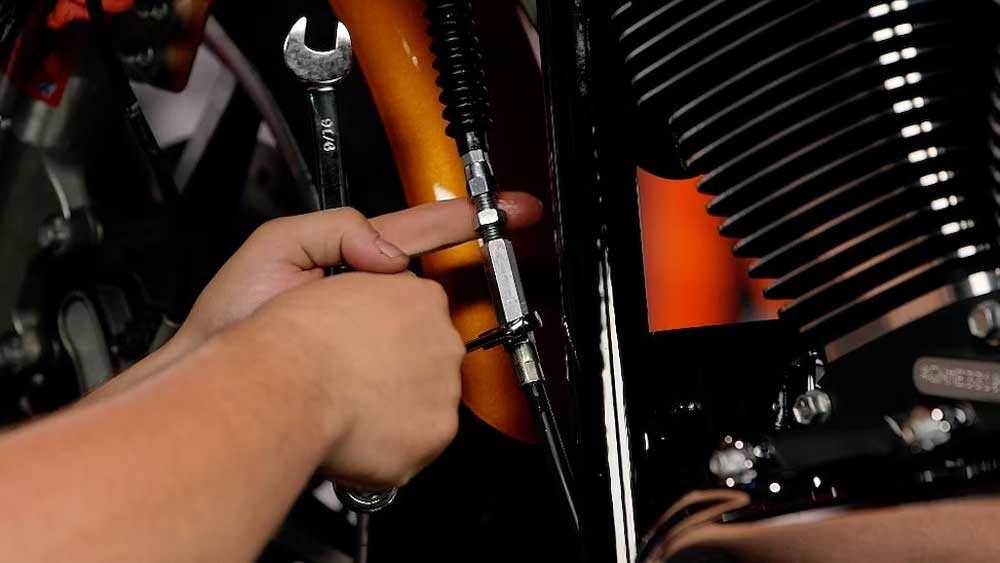
8. Controls
Check your clutch and throttle for smooth operation and adjustment. Unstick your clutch and throttle cables with cable lube and this handy tool, and adjust your push and pull cables until you have a tiny bit of slack before the throttle begins to open, and it returns to idle position on its own.
If your hard clutch pull or sticky throttle can’t be lubricated away or adjusted out, look for interference on the lever or throttle tube itself or binding from improper cable routing. If the cables are worn, replace them.
Sit on the bike and make sure your mirrors haven’t come loose. Turn the handlebar lock to lock and check for cable and wiring interference or strain, and feel for notchiness in the steering head bearings. Double check your shifter and brake pedal are indexed where you want them.
You might’ve gotten used to a position that was less than ideal last season, so adjust now before you build up that muscle memory again. Whether you tweak anything or not, make sure both brake and shifter are tight (thread locker is my old friend). If you’ve never had a shift lever come loose and trash the spline shaft, consider yourself lucky (it is a very invasive, labor-intensive job sure to cost you an appendage at the dealer).

9. Final check
Break out the torque wrench and hit all your critical fasteners: handlebar and triple clamps, axle bolts and adjusters, and motor mounts. Double check your oil and coolant levels. Run back through anything you disturbed during your inspection and verify you tightened everything back down.
Grab a tire gauge and verify proper pressure. If you’ve had your battery charging while you checked over the rest of the bike, test your lights and horn now. Finally, fire it up and you’re ready for a shakedown run to the gas station for some fresh fuel! Remember to let your engine warm up before hammering down the road, and that your tires might still be cold and slick.
There you have it. Now, as Spurgeon would say, “Enjoy the ride.”
Conclusion
In conclusion, standard cruiser upkeep is basic for keeping your bike running easily and securely. By taking after the tips laid out in this article, you’ll guarantee that your bike remains in best condition for a long time to come.
Keep in mind to alter the oil routinely, check the tires, keep the chain greased up, check the brakes, keep the battery charged, and supplant the air channel. By doing so, you’ll appreciate a smoother, more effective ride and spare cash on expensive repairs within the long run.
Facebook: https://www.facebook.com/Motobikeinworld
Twiter: https://twitter.com/motoinworld2023
Instagram: https://www.instagram.com/motoinworld/
Pinteres: https://www.pinterest.com/motoinworld/
Linkedin: www.linkedin.com/in/motoinworld